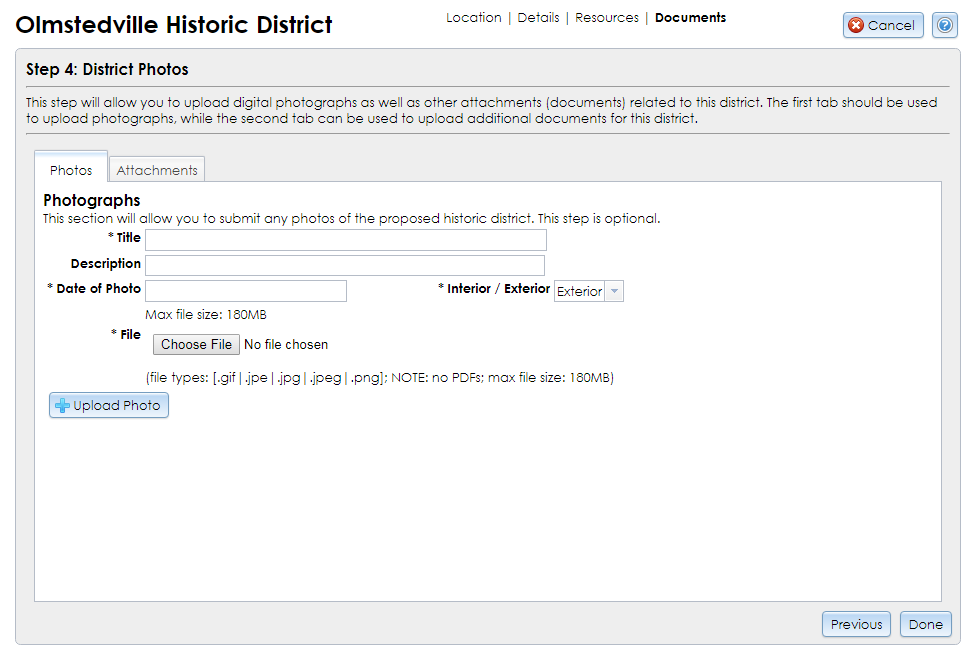
The final step of the District Resource Wizard allows you to upload photographs and attachments related to the district as a whole. If you have files related to specific built resources within the district, please upload them with each built resource at Step 3: Resources Found in District. This step is optional, but you must click the Done button to save the district record.
Any photographs and attachments you upload at this step will be attached to SHPO’s USN record for the district and will be publicly accessible. These files will be used by SHPO to evaluate the historic integrity of the district, and may include present or historic photographs or historic documentation.

If you choose to upload one or more photographs, fill in the following information for each photograph. Required fields are marked on the form with an asterisk (*).
.gif.jpe / .jpeg / .jpg.pngClick the Upload Photo button to save the photograph to your submission. After the photograph finishes uploading, the form will reset and the photograph record will be listed in the Uploaded Photos grid below the Upload Photo button. You may remove a photograph from the list by clicking the red X button.

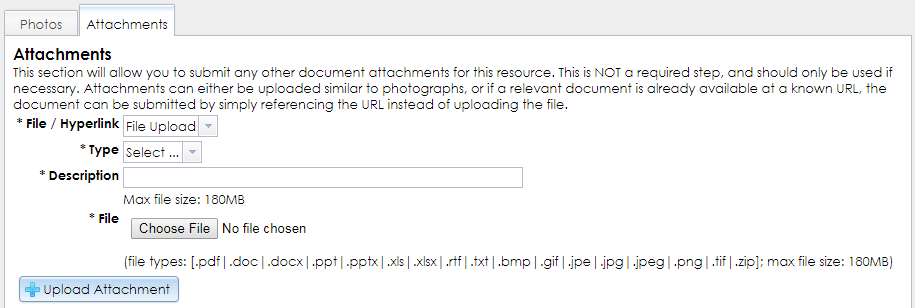
If you choose to upload one or more attachments, enter the following information for each attachment. All of these fields are required.
.pdf (SHPO prefers this format for drawings, plans, and text documents.).zip (This format may be used to send compiled GIS or CAD files.).bmp.doc / .docx.gif.jpe / .jpeg / .jpg.mp3.png.ppt / .pptx.rtf.tif / .tiff.txt.xls / .xlsxhttp:// or https:// prefix) and paste the URL in the text field in CRIS.After selecting the file or entering the hyperlink, click the Upload Attachment or Submit Hyperlink button to save the attachment to your submission. After the attachment finishes uploading, the form will reset and the attachment record will be listed in the Uploaded Files grid below the Upload Attachment button. You may remove an attachment from the list by clicking the red X button.
After you have uploaded your district photographs or attachments, click the Done button in the lower right corner to save the district resource record and return to the consolidated response page. If you wish to return to an earlier step in the District Resource Wizard, be sure to click Next to save the current step before clicking Previous to go backward. You must return to Step 4 and click Done to save the district resource.