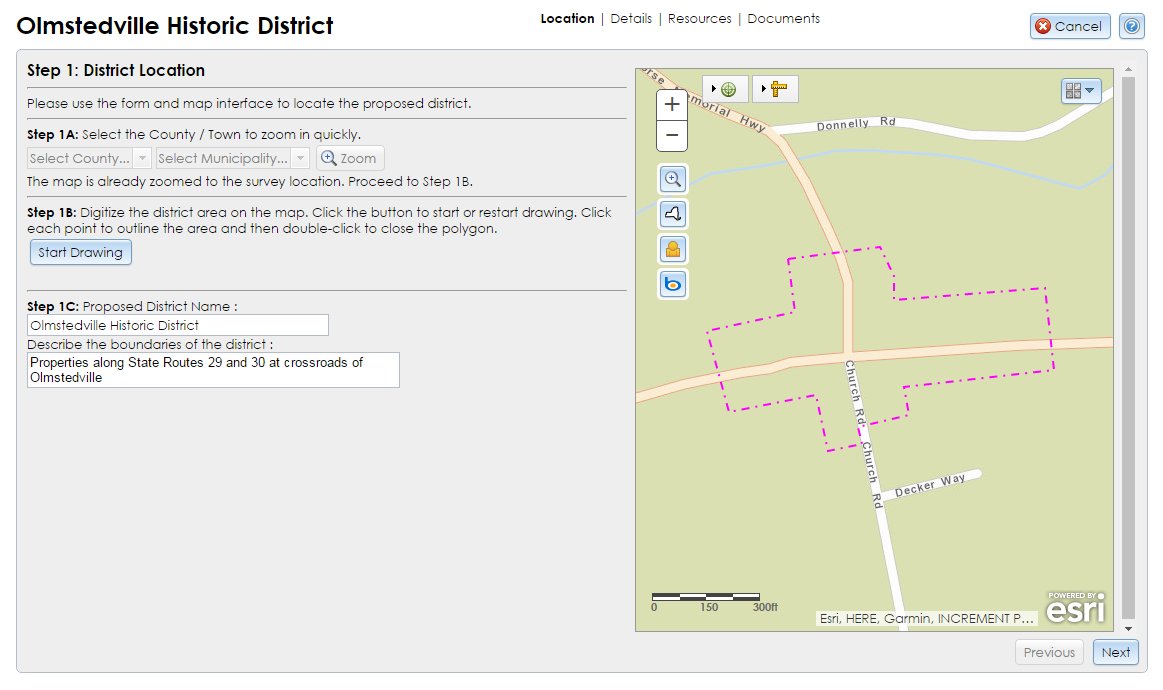
The first step of the District Resource Wizard allows you to place the district’s location on the map.

Step 1A: Select the County / Town to zoom in quickly: This step is optional. You can use it to zoom the map to a particular city, town, or village so that you may find the approximate location of your survey.
To zoom to a whole county, select a county name and click the Zoom button. To zoom to a municipality, select a county name and a municipality name and click Zoom. Note that some municipalities may not be represented on the map due to dissolutions, new incorporations, and other discrepancies between the municipality table and the GIS layer. Alternatively, you may use the Zoom In/Out buttons or the Locate tool on the map interface to find your district location.
Step 1B: Digitize the district area on the map: Click the Start Drawing button to open the drawing tool. Using the Basemap control in the upper right corner of the map interface, switch the basemap to NYS Orthos to show buildings, landforms, and other details, which will help guide your drawing.
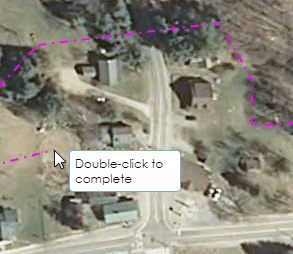
On the map, click the location of a corner of the district boundary. This click will set the first vertex point for the district and a magenta dotted line will follow your cursor, as shown in the first image below. Click the map at other points to continue setting corners along the district boundary. While drawing, you may pan the map by clicking, holding, and dragging the basemap. A vertex will not be set until you release the basemap and click the map again. You may also zoom in and out using the mouse’s scroll wheel or the Zoom In/Out buttons in the upper left corner of the map interface.
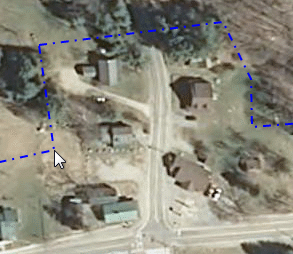
Double-click at the last corner of the district boundary (before the first point you drew) to complete it. The drawing tool will automatically connect the last point you draw to the first one. Avoid double-clicking very close to or on the first point you drew, since this may cause your boundary to overlap itself, which will make the boundary invalid. After you complete the boundary, the magenta dotted outline will change to blue, as shown in the second image below.


If you define a district area that falls partially or completely outside of New York State’s boundaries, an alert will display: The location you defined is not fully within New York State. If this is not correct, please make changes to your location information and try again.
Some locations near the border, in Lake Ontario, or in the ocean may trigger this alert. It will not prevent you from submitting your district resource.
If you need to redraw the district area, click the Start Drawing button again.
Step 1C: Enter basic information about the district. Both of these fields are required.
Click the Next button to proceed to Step 2: District Details. If you wish to return to an earlier step, be sure to click Next to save the current step before clicking Previous to go backward.
Note: If you click the Cancel button in the upper right corner at this step, the information you entered in Step 1 may not be saved. Proceed through the District Resource Wizard and click the Done button at Step 4 to save the district resource.