|
Before the user can collect building inventory form data, they are required to select a survey project from the pick list in the control panel (the pick list contains the survey project numbers for which the user is a team member).
.png)
Once a Survey Project is selected, the project name is displayed in the control panel and the map is zoomed to the survey area boundary for the selected survey as shown in the image below.
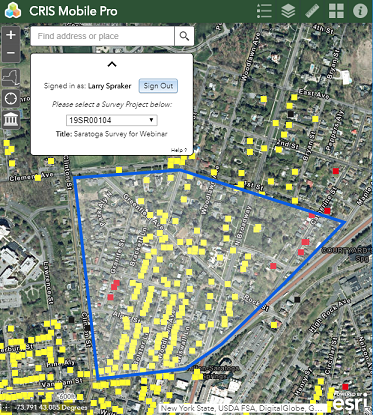
The survey area for the selected survey project is displayed as a blue polygon, while existing CRIS building resources are displayed as square symbols (color based on eligibility).
Collapsing the Survey Project Panel
The survey project panel can be collapsed after selecting the desired project by clicking the up arrow icon at the top of the panel. This will maximize the map display for viewing (to expand the panel, click the arrow icon again).
.png)
|