|
The measure tool can be used to measure lengths, areas or to identify the coordinates for a specified location. Clicking the measure tool button .png) will display a popup dialog, which allows the user to choose their type of measurement. To begin, the user selects their measurement type by clicking the icon for the desired type (distance, area or location) as shown by the image below. will display a popup dialog, which allows the user to choose their type of measurement. To begin, the user selects their measurement type by clicking the icon for the desired type (distance, area or location) as shown by the image below.
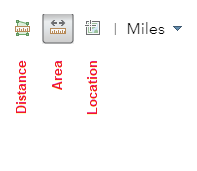
A unit picklist is then displayed from which to select the desired unit of measurement (e.g., miles, feet, etc.). The user then traces a graphic (e.g., line, boundary or point) on the map to measure their desired distance, area or location as described below:
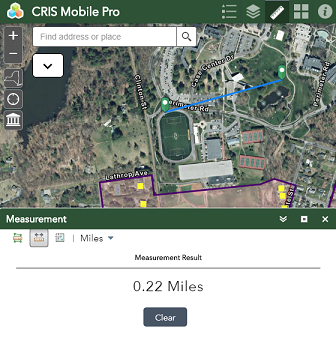
•Distance (multi-point line) - Click the beginning point of a line, then click each point along the line, double-clicking the last point to end the line. The distance is displayed live in the panel as the user defines the line. When the line is ended, the final distance is displayed as static text.
•Area (boundary) - Click the beginning point of a polygon/boundary, then trace a boundary by clicking each point along the boundary (min. of 3), double-clicking the last point to end polygon (note: to close the polygon the user does NOT have click again at the start point). The area is displayed live as the user defines the boundary. When the boundary is finished, the final area is displayed as static text.
•Location (point) - Click a location anywhere on the map and the coordinates of the point will be displayed in the panel.
Clearing the Measurement
To clear the measurement graphic defined and start a new measurement, click the Clear button at the bottom of the measurement panel.
|